BeagleBone Black
Find below my experiences with the BeagleBone Black (BBB) revision 3.
First Boot
First boot with BeagleBone Black is best done by using a serial communication program like CuteCom or Putty.
Attach the USB connector to your PC and issue this command to find the tty-port that will be created:
$ ls -lart /dev
drwxr-xr-x.  2 root root            80 Aug 16 13:19 bsg
crw-rw----.  1 root disk       21,   1 Aug 16 13:19 sg1
drwxr-xr-x.  2 root root          3900 Aug 16 13:19 char
drwxr-xr-x. 22 root root          3560 Aug 16 13:19 .
brw-rw----.  1 root disk        8,  16 Aug 16 13:19 sdb
drwxr-xr-x.  6 root root           120 Aug 16 13:19 disk
drwxr-xr-x.  2 root root           200 Aug 16 13:19 block
crw-rw-rw-.  1 root dialout   166,   3 Aug 16 13:19 ttyACM3
crw-rw-rw-.  1 root tty         5,   0 Aug 16 13:20 tty
crw-rw-rw-.  1 root tty         5,   2 Aug 16 13:21 ptmx
The above list show the devices created when attaching the USB cable. The line of interest here is the ttyACM3 - might differ on other systems.
Since normal users normally not are member of the dialout group the quickest way to gain access to the tty-port is to issue this command:
$ sudo chmod o+rw /dev/ttyACM3
This will give a normal user access to the port.
Alternatively modify the /etc/group to allow the login to be member of the dialout group.
Now open the CuteCom or Putty port on a serial line using /dev/ttyACM3 and 115200 bps as settings.
An output like this can be seen:
Login timed out after 60 seconds.

\0x1b[r\0x1b[H\0x1b[J

Debian GNU/Linux 7 kolles-beaglebone ttyGS0

default username:password is [debian:temppwd]

Support/FAQ: http://elinux.org/Beagleboard:BeagleBoneBlack_Debian

The IP Address for usb0 is: 192.168.7.2
kolles-beaglebone login:
Now login using the defaults given.
Also try to issue
$ ssh debian@192.168.7.2
This will open an ssh connection over the USB cable, which also supports networked traffic, to the BBB.
Yocto Project
Yocto Project, see the home page for further details, can create a distribution for the BBB.
For instructions on how to build your own Yocto Project Distribution see Yocto Project Build Instructions.
Monitor the boot process
Only if the u-boot causes problems a serial connection may be helpful, otherwise it is usually enough to wait until the USB interface becomes available in the boot process.
So if the u-boot messages should not be monitored, just connect the USB cable to the PC and start the favourite serial communication program, e.g. CuteCom, Putty or screen. Wait until the tty USB device becomes available. The USB interface will become available when the system is near the end of the boot process - and at that time the u-boot messages are long gone.
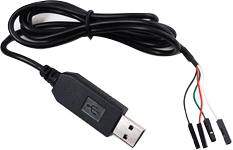
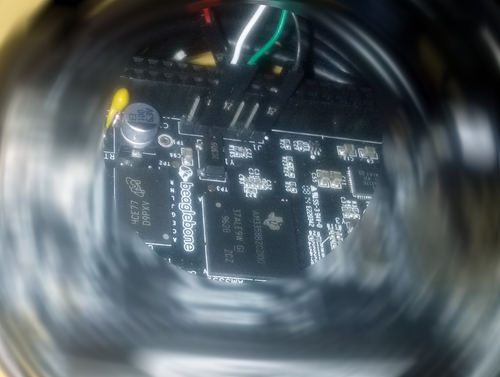
If, for some reason, the board won't boot, a serial cable need to be connected to the board. Get a PL2303 cable - or build one your self... Connect the serial cable to the port to J1 as shown below.
 Board       Wire    Function
 Pin 1.....Black.....Ground

 Pin 4.....Green.....Receive

 Pin 5.....White....Transmit
 (Where pin 1 is the one near the white dot)
Creating the boot SD
There are several methods to create a bootable SD card.
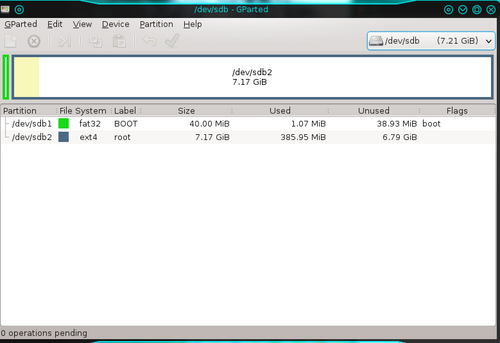
The easiest way is to use a graphical interface, e.g. gparted
Create two partitions, one size 40, or more, megabytes for u-boot and one for the rest of the SD card - here 7+ GB.
Label the boot partition boot and the other partition root.
The boot partition shall be a primary partition of type FAT32 while the rest is a ext3 or ext4 file system. Format the partitions to the designated file system types and set the boot flag for the boot partition.
Mount the two SD card partitions.
Copy from the Yocto Project distribution the MLO and the u-boot.img files to the boot partition.
As a root user untar the compressed root file system that bitbake produced.
$ cd <your mounted root partition>
$ sudo tar xf <your path to poky>/beaglebone/tmp/deploy/images/beaglebone/core-image-sato-beaglebone.tar.bz2 .
$ sync
This is what is happening:
- First change to the SD card, where it is mounted (on Fedora it is typically /run/media/<username>/root)
- Then untar the compressed root file system from where bitbake built it (here it is the graphical core-image-sato distribution)
- Finally issue sync to let the kernel write everything to the SD card - when sync returns unmount the SD card.


